 | One of my greatest passions in life is doing graphic work in Photoshop. It has been since Photoshop 3.5 and continues to be so all the way until today. One of the things I wanted to include in my support blog is to include simple tips and tricks for Photoshop that can help the new user to get by in the program. Get a copy of Photoshop Elements with your digital camera? Well, stick around and maybe some of the tips I include could be useful for you as well. Today I will be covering some of my favorite and most used tools while in Photoshop (I use Photoshop for EVERYTHING, by the way). Many of these tools will become your favorite tools as well once you get a chance to try them out. Because I don't have a ton of time today I'll just cover the two three tools that I use daily in my Photoshop work: |
 | The Pen Tool To me, the pen tool is the Excalibur of Photoshop. I used to be a heavy lasso user, taking pride in doing exact lines all the way down to pixel-to-pixel cuts. After years of experience I have come to the conclusion that those exact pixel-to-pixel cuts while looking good do not look as fluid as the use of the pen tool.  Using the pen tool may seem a bit daunting at first; however, with a little practice you will wonder how the hell you ever got around in Photoshop without it. Trust me. It's a time saver. A couple of tips for the pen tool: a) Holding Alt while dragging across path anchors will give a soft curve to the arch you are creating. Remember, to make an arch, you must have two points. :) b) If you want something more angular, you can hold Ctrl to remove any automated curvature added to the pen path. If you make a mistake, this is a good way to "reset" the anchor point to allow you to use the previous tip to make a nice, curvy line. c) You can not only pull on anchors with the Alt key held, but also on the lines themselves which will gently create a curve on the line. |
 | The Paint Brush I prefer to use the paintbrush in "airbrush" mode.  It allows the paintbrush (which by default acts like a standard paintbrush that is "loaded" with paint) to act more like an airbrush or spray paint. The airbrush in conjunction with various other tools (and layers) can make very nice gradients and mixtures of colors that are difficult (or impossible) to create otherwise. Another thing that this tool allows you to do is to create actual digital paintings (the paintbrush tool is very customizable and could in theory be in its own feature blog... Perhaps sometime). Learn the tool... Love the tool. To me, the paintbrush went from being a bane to being a blessing (think paintbrush + gaussian blur for nice faded gradients) as I evolved in my Photoshop usage. |
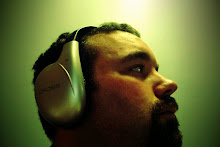
 | The Healing Brush The third tool that I use the most, and definitely my favorite of the three to use, is the healing brush. Ever wonder how a Photoshop wiz takes out all of the imperfections in someone's skin? Non-industry people call that "airbrushing" the photo... I call it "healing the photo." :) It's a very handy tool and if you do any photo manipulation/repair it is a must to learn how to use this tool.  To the right, you see an example of a very quick and dirty healing brush touch-up done to a photo of a subject with advanced acne. As you can see [right side], the appearance of acne has been diminished greatly as well as the smoothness of the skin being brought in. The scarring has been removed for the most part and a couple of touch-ups have been made to the bridge and ball of the nose. I hope you have enjoyed learning a bit about a few of my favorite Photoshop tools! Take care. |


No comments:
Post a Comment